Showing posts with label Sprinkle mist. Show all posts

Monday, February 11, 2019

Cherish the Little Moments - Art Journal Page

Hola crafty peeps,

With love in the air, I decided to dedicate a page in my journal to a simple moment from my life. I wanted to celebrate my love for kids specially my niece and nephew who are very precious to me. So i decided to do a cute little layout for a pic close to my heart. 


I have used some beautiful colors of sprinkle mists and added some fun textures using crackle paste and texture paste with stencils from expressions craft. Here are some detailed pics -


Here is a video tutorial on the complete process from start to finish for this simple yet memorable layout. 


Hope you liked the project and are inspired to make one of yours too. 

Until Next Time
XOXO

Jk


--

Supply List 

Wednesday, January 30, 2019

Travel More - Art Journal Page

Hola crafty peeps,

Many of you have asked me on how to make art journal pages, what to use, how to use! So to end all your misery I thought of doing a step by step tutorial for you all to watch and learn. I started art journaling only recently myself so i am gonna share all that I know with you all. 


Since my goal for this year is to travel more and wander into nature as much as I can, therefore, I thought of representing it in the best way I know which is mixed media. here are some close ups - 


So let's dive into the tutorial!


Hope you liked the simple process of making this journal page and are inspired to create one of yours as well. Do tag me in your journal pages I would love to see them. 
Also, don't forget to follow my blog and subscribe to my YouTube channel for more video tutorials. 

Until Next Time,
XOXO

JK

PS - With this I participate in more than words monthly challenge. 

--

Supply List - 

Mod Podge Matte
Heavy gesso White - Expressions Craft
Heavy Gesso Black - Expressions Craft
Blue Atlas Chalk Paint - Expressions Craft
Pink Punch Chalk Paint - Expressions Craft
Stamps from Aliexpress
Jet Black Archival Ink
Diamond Stencil - Expressions Craft
Sentiment Stencil - Expressions Craft
Fuchsia Pink Sprinkle Mist - Expressions Craft
Washi Tape from Aliexpress

Saturday, December 8, 2018

Art Journal - Love Beyond Words

Hola crafty peeps,

Up for another inspiring project to make your weekend more crafty? I have recently started my own art journaling. As a mixed media artist i feel that many ideas that we have go unimplemented and later forgotten. So to capture most of my ideas on regular basis, I started art journaling. 
In my opinion Art Journal is an artist's space where he/she can be themselves. Make what their heart desires without fear of making a mistake. Trying hands on a new technique I bring to you a page from my art journal. Ta-da! 


To create this art journal page I used the minimum supplies possible so that any beginner can make one too. So without further a due let's see how its done!

Step 1 - Prime the areas of the pages, where you have to work, with white/clear gesso. 

Step 2 - Take any string/cord long enough to make spirals and dip it into the spray paints of your choice. Take out the string and make circular spirals on the page. Put a waste paper on top and press a little hard and pull the string from below the waste paper. And voila! you have a beautiful string texture + color on your page. 
Repeat the process with as many colors you want, I used three. 


Step 3 - Use some washi tape and apply it here and there to add another flat layer and give your page a little texture. 


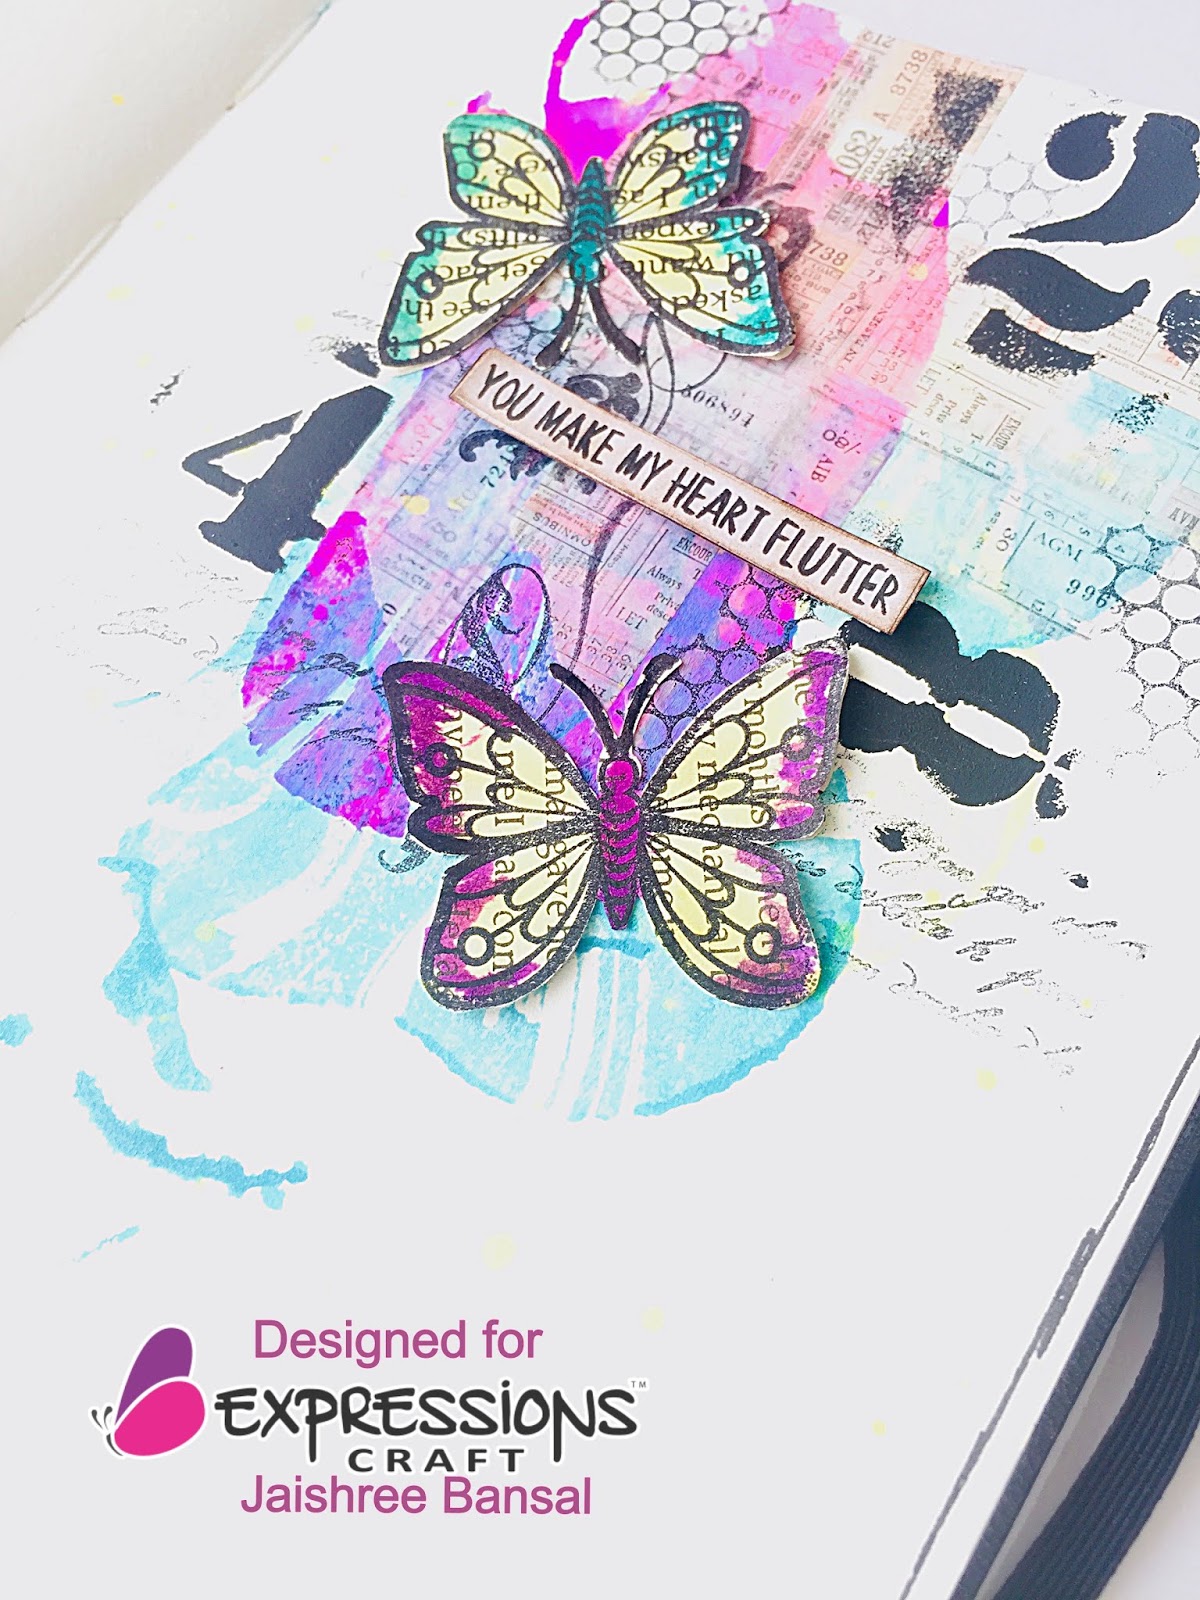
Step 4 - Take any stencil of your choice and add color with the help of a sponge and black gesso. I used the newly launched mini stencils from Expressions Craft. I think they are perfect to work with on projects with smaller areas. I used the number stencil here. 


Step 5 - Stamp and cut a couple of butterflies on an old book paper and color it using the spray paints used earlier. 


Step 6 - Add the butterflies on one side of the page along with a sentiment and on the other side of the page just add the sentiment. 

Step 7 - Lastly, using a background stamp, stamp here and there to add more texture and using a gel pen black, make a boundary with free hand. 


Here are some close up images!


Hope you liked this project and are inspired to make one of yours too. Do tag me in your projects inspired by this, I love to see your creations. 

Until Next Time,
XOXO

JK


Monday, November 5, 2018

Mixed Media Treasure Chest

Hola crafty peeps,

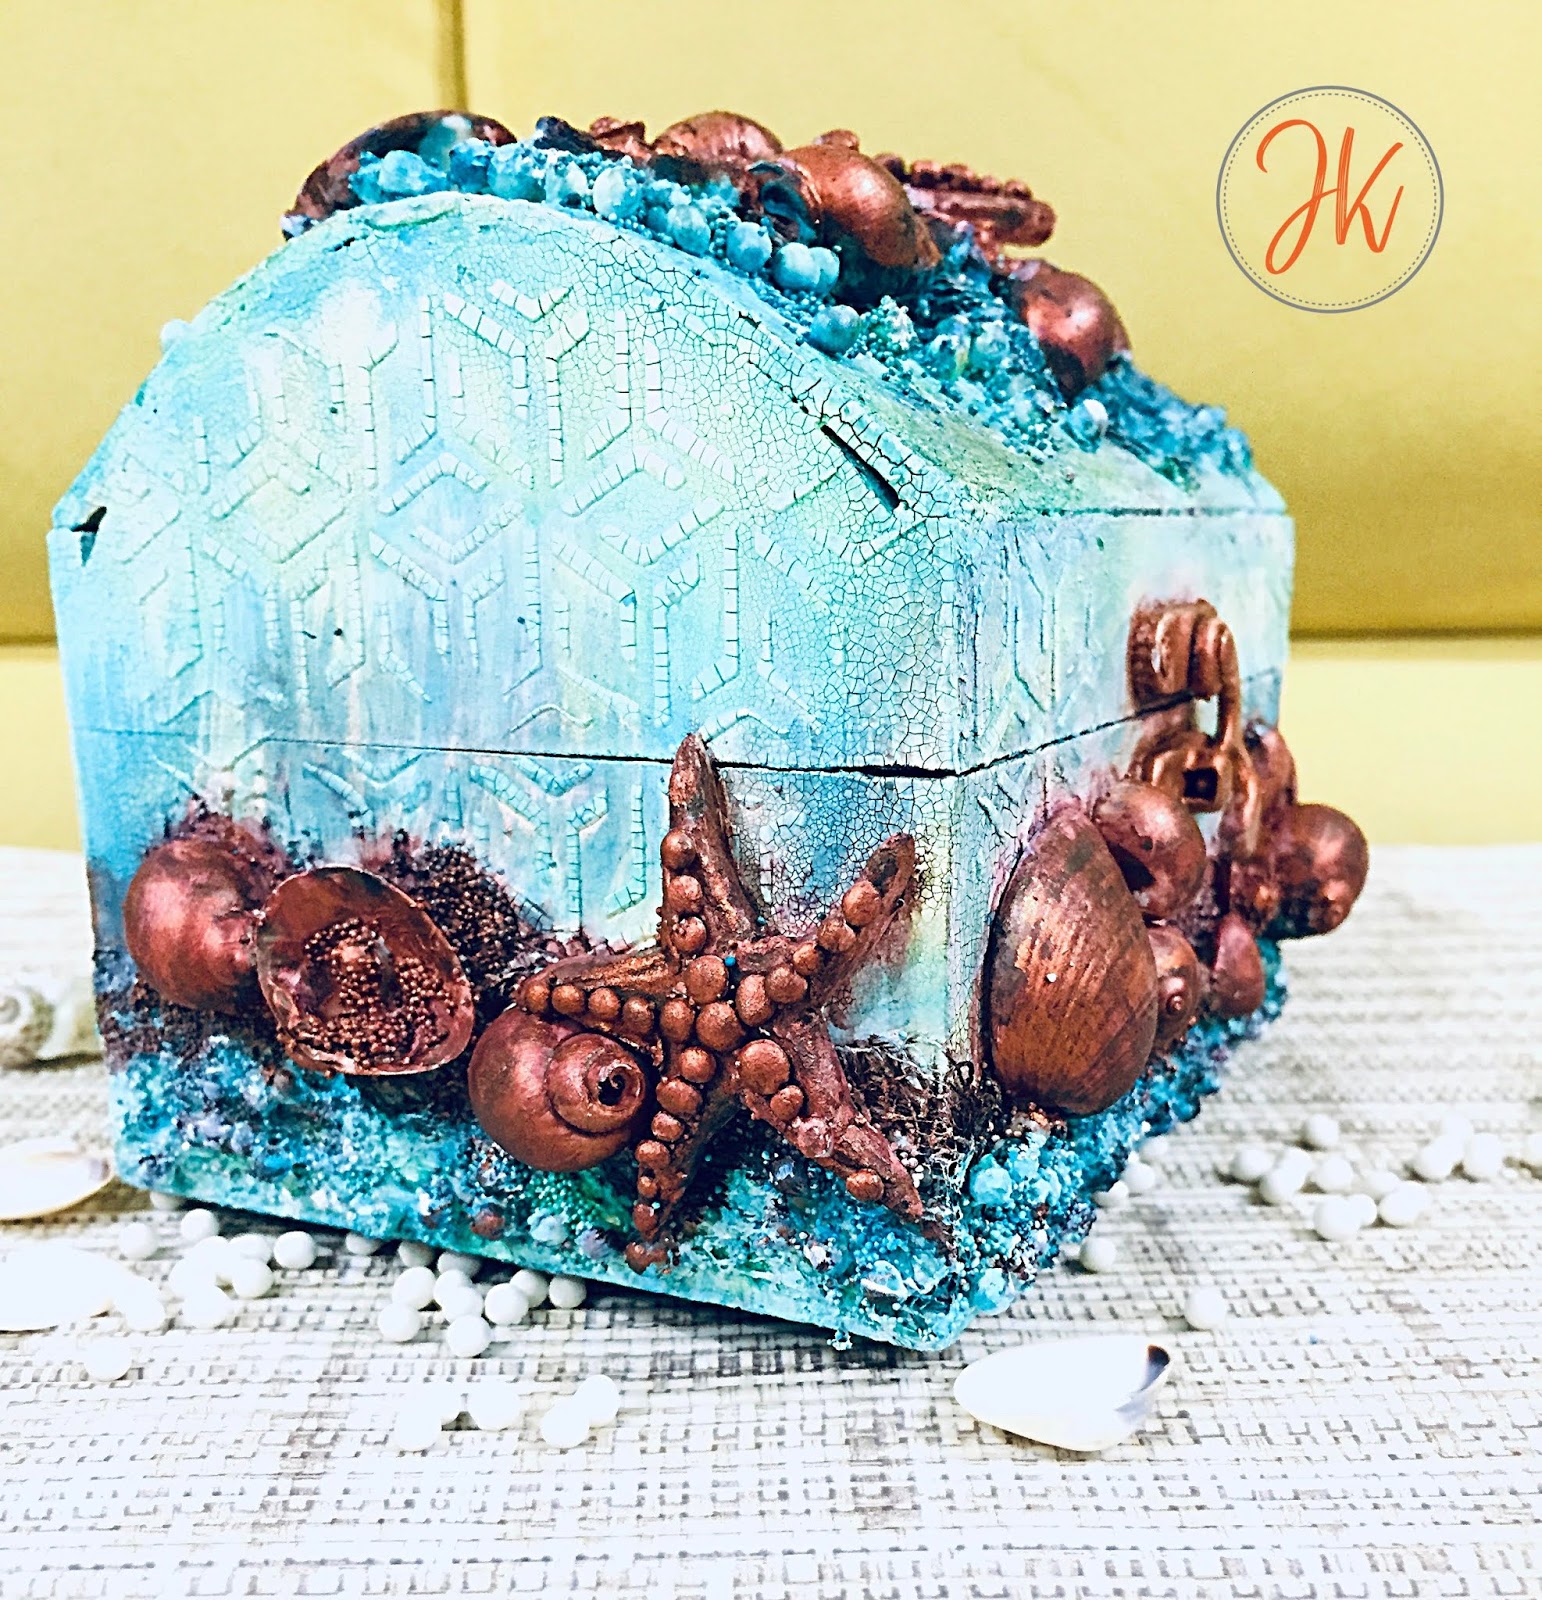
I am back with yet another mixed media project for you all. This time I have altered a MDF box into a beach theme treasure chest. This project was made for Expressions Craft's monthly challenge  inspiration as one of their design team members. 

I have used very simple techniques in creating this. I used lots of seashells and a few handmade paper clay starfishes. Going with the mood-board, I have used teal and rust colors for my project. So without further wait, let's dig in!

Step 1 - Cover the box with white gesso first and then add black gesso on all the edges.


Step 2 - Cover all the black gesso areas with crackle texture paste and let it dry naturally. Apply a mix of thick and thin layer of crackle texture paste. 


Step 3 - Once dried completely, Using the stencil of your choice and crackle texture paste, make designs on all four sides of the box. 


Step 4 - Once all the crackle paste is dried, adhere all beach elements & deco art stones using heavy body gel medium and let dry. After the elements have stuck properly, cover everything with white heavy gesso. (I added a layer of medical gauge on top of the box before adding my elements.)


Step 5 - Color the box base in teal color and all the elements in rust color. I added a lil bit of yellow as well to make the transition of the colors look real. 


Let's get a closer look!


Hope you like the project! Do tag me in your creations if you are inspired by this one. And lastly, do not forget to participate in the ongoing challenge at Expressions Craft studio here. 

Until next time
XOXO

JK


--

Supply list - 
  1. IMMIX Heavy Gesso - White & Black
  2. IMMIX Deco Art stones - Medium & Mini
  3. IMMIX Crackled Texture Paste
  4. IMMIX Sprinkle Mists - Deep Teal, Persimmon, Chest Nit, Burnt Orange
  5. Expressions Craft Stencil - Weave Pattern

Monday, October 29, 2018

Mixed Media Layout - Video Tutorial

Hola crafters,


This is Jaishree this side and I am here with yet another mixed media project for you all. Today I will be sharing with you, a video tutorial, on how to make this vibrant and colorful mixed media layout. I used the amazing IMMIX Art essentials for mixed media. 


I loved using the IMMIX products as they are of the best quality a mixed media artist can dream of. You should definitely try them if you haven't already. 
And now on to the project! Here's is the process step by step video tutorial for this colorful and vibrant layout. 
Let's dig in!  


Hope you all enjoyed this video tutorial. Do share your thoughts and let me know what more tutorials you would like to see. And don't forget to subscribe my channel. 

Until next time
XOXO

JK

----

Supply list

IMMIX Heavy gesso white
IMMIX sprinkle mists - Deep teal, fuchsia pink, citrus yellow, persimmon
Expressions craft stencils - feather & weave 
Expressions craft chipboard - birds & branches and leafy wreath
Kraft cardstock


Wednesday, October 24, 2018

Altered Bottle

Hola crafty peeps,

With halloween around the corner and fall season upon us, I thought of creating something different. As mixed media is my first love, I have tried to alter a glass bottle in a very rustic pirate kind of style. I have used the beautiful Immix products in my alteration. lets dig in!


For the background, I started by adhering foam sheet cut into small rectangles and squares. I added some flat back pearls to give the effect of nails on the corners of each piece. I used the inner spears of the gear chipboard from expressions craft to adhere on the front of my bottle. Next I used some old ball chain in the smallest size and wrapped around the bottle in a very unmanaged way.

I covered everything on the bottle with IMMIX black heavy gesso. I sprayed some IMMIX sprinkle mist in the color Deep Teal and while it was wet, sprinkled IMMIX fairy dust blue. It gave my bottle a very sparkly blue look. Once dried, I dry brushed IMMIX baby blue chalk paint on the bottle unevenly. this gave the bottle a very nice faded jeans effect. 


Now came the part where I had to give the rust effect. To create my own rust colors, I used acrylic paints and added some sprinkle glitz to it. This can be achieved by adding sprinkle glitz to IMMIX chalk paints as well. Only a pinch of sprinkle glitz is more than enough. I used the colors sienna, red and mustard in acrylic paints. All you have to do is dab the three colors here and there on top of each other. 


Try not to cover the entire bottle, leave some places for the background color to be visible. Once all dried, I topped the nails and my front embellishments with some mettalique wax and sprayed the IMMIX sprinkle mist in the color citrus yellow to highlight my embellishments and some other random areas. 


The IMMIX products are truly amazing and you should really try them in your projects to get a wonderful finish. 
Thanks to these products I was able to achieve this amazing rustic look. 


I hope you liked my alteration and are inspired to make one for yourself too. Do tag me in your creations if you make any on the similar lines. Leave a comment below in case you have any questions. 

Until next time
XOXO

JK

---


Products used


IMMIX black gesso

IMMIX chalk paint baby blue
IMMIX magic sparks
IMMIX fairy dust blue
IMMIX sprinkle mist citrus yellow
IMMIX sprinkle mist deep teal
Expressions craft chipboard embellishment gear
Prima marketing rust effect paste set


Wednesday, October 10, 2018

Mixed Media Cards

Hello crafty people,

This is Jaishree this side. Today, I am here with a picture tutorial on how to create these two beautiful mixed media cards with the amazing Immix products.


The Immix products are so amazing that even if you are a beginner you'll be able to create these cards in no time. So, without further adieu lets get started!

I created these two cards measuring 6x6 inches. Then I cut two pieces of paper in the size 5 7/8 x 5 7/8 inches in order to create the layer to work on. I distressed all the edges of both the papers.


Next to add texture to my background I mixed Immix texture paste with some sprinkle glitz to make my paste grainy. 


I used two different stencils from expressions craft for both the cards. Using the above made texture paste, I created lovely backgrounds with the stencils. 


Using the beautiful sprinkle mist spray paints I added two colors of paints on each cards background. on one card I used yellow and red tones while on the other I used pink and blue tone. Also, I added a tint of titanium white where ever I thought the color was too dark. 


Next to start layering my cards I added a few pieces of corrugated sheet and gave it a coat of heavy gesso white from Immix. This gesso has a creamy consistency which is very easy to spread and also gives great coverage within the first coat. 


Next I used magic sparks from Immix to add a little sparkle and glitter to my chippies. I used leafy wreath chippies from expressions craft. I covered the complete chippie with glossy accent first and then sprinkled the magic sparks onto it. I used both circular and the heart shaped chippie from the pack for each of the card.


I also added glitter to my flowers using fairy dust. I used green fairy dust for yellow flowers and blue fairy dust for my aqueduct colored flowers. 


To assemble everything together, I started with chippies, filled in some cheesecloth (colored it in the same colors as each cards background), topped it up with sentiments and butterflies. 
In card one I used shabby crinkled flower in the color lemon twist along with mixed boutique 2 filler flowers both from expressions craft. In card two, I used shabby crinkled flower in the color aqueduct. 
I finished my cards by adding some Deco art stones medium and mini and some splatters of white titanium sprinkle mist. Here's the finished look of the cards.


Lets's take a closer look at the cards!


Hope you all liked my cards and are inspired to create some yourselves too. Do share your cards with us at the expressions craft club and participate in the monthly challenge. 


Until next time
XOXO

JK

--


Supplies used in this project - 
  • IMMIX heavy gesso white
  • IMMIX texture paste
  • IMMIX magic sparks, sprinkle glitz & fairy dust
  • IMMIX sprinkle mists - citrus yellow, persimmon, deep teal & fuschia
  • IMMIX deco art stones medium
  • Expressions craft stencil - diamond & weave pattern
  • Expressions craft botanical melange flowers
  • Expressions craft wreath chipboard