Hello creative crafters,
I am super excited to share this last blogpost for the year 2018! This year has been super amazing for me as a crafter. My journey has been very bumpy and I saw many ups and downs. But with all of you all's support and overwhelming response to my creative projects, I feel blessed to be a crafter today.
Before getting into the project I want to thank each and everyone of you for liking my projects and always encouraging me to be able to make something new and exciting for you all to be inspired from.
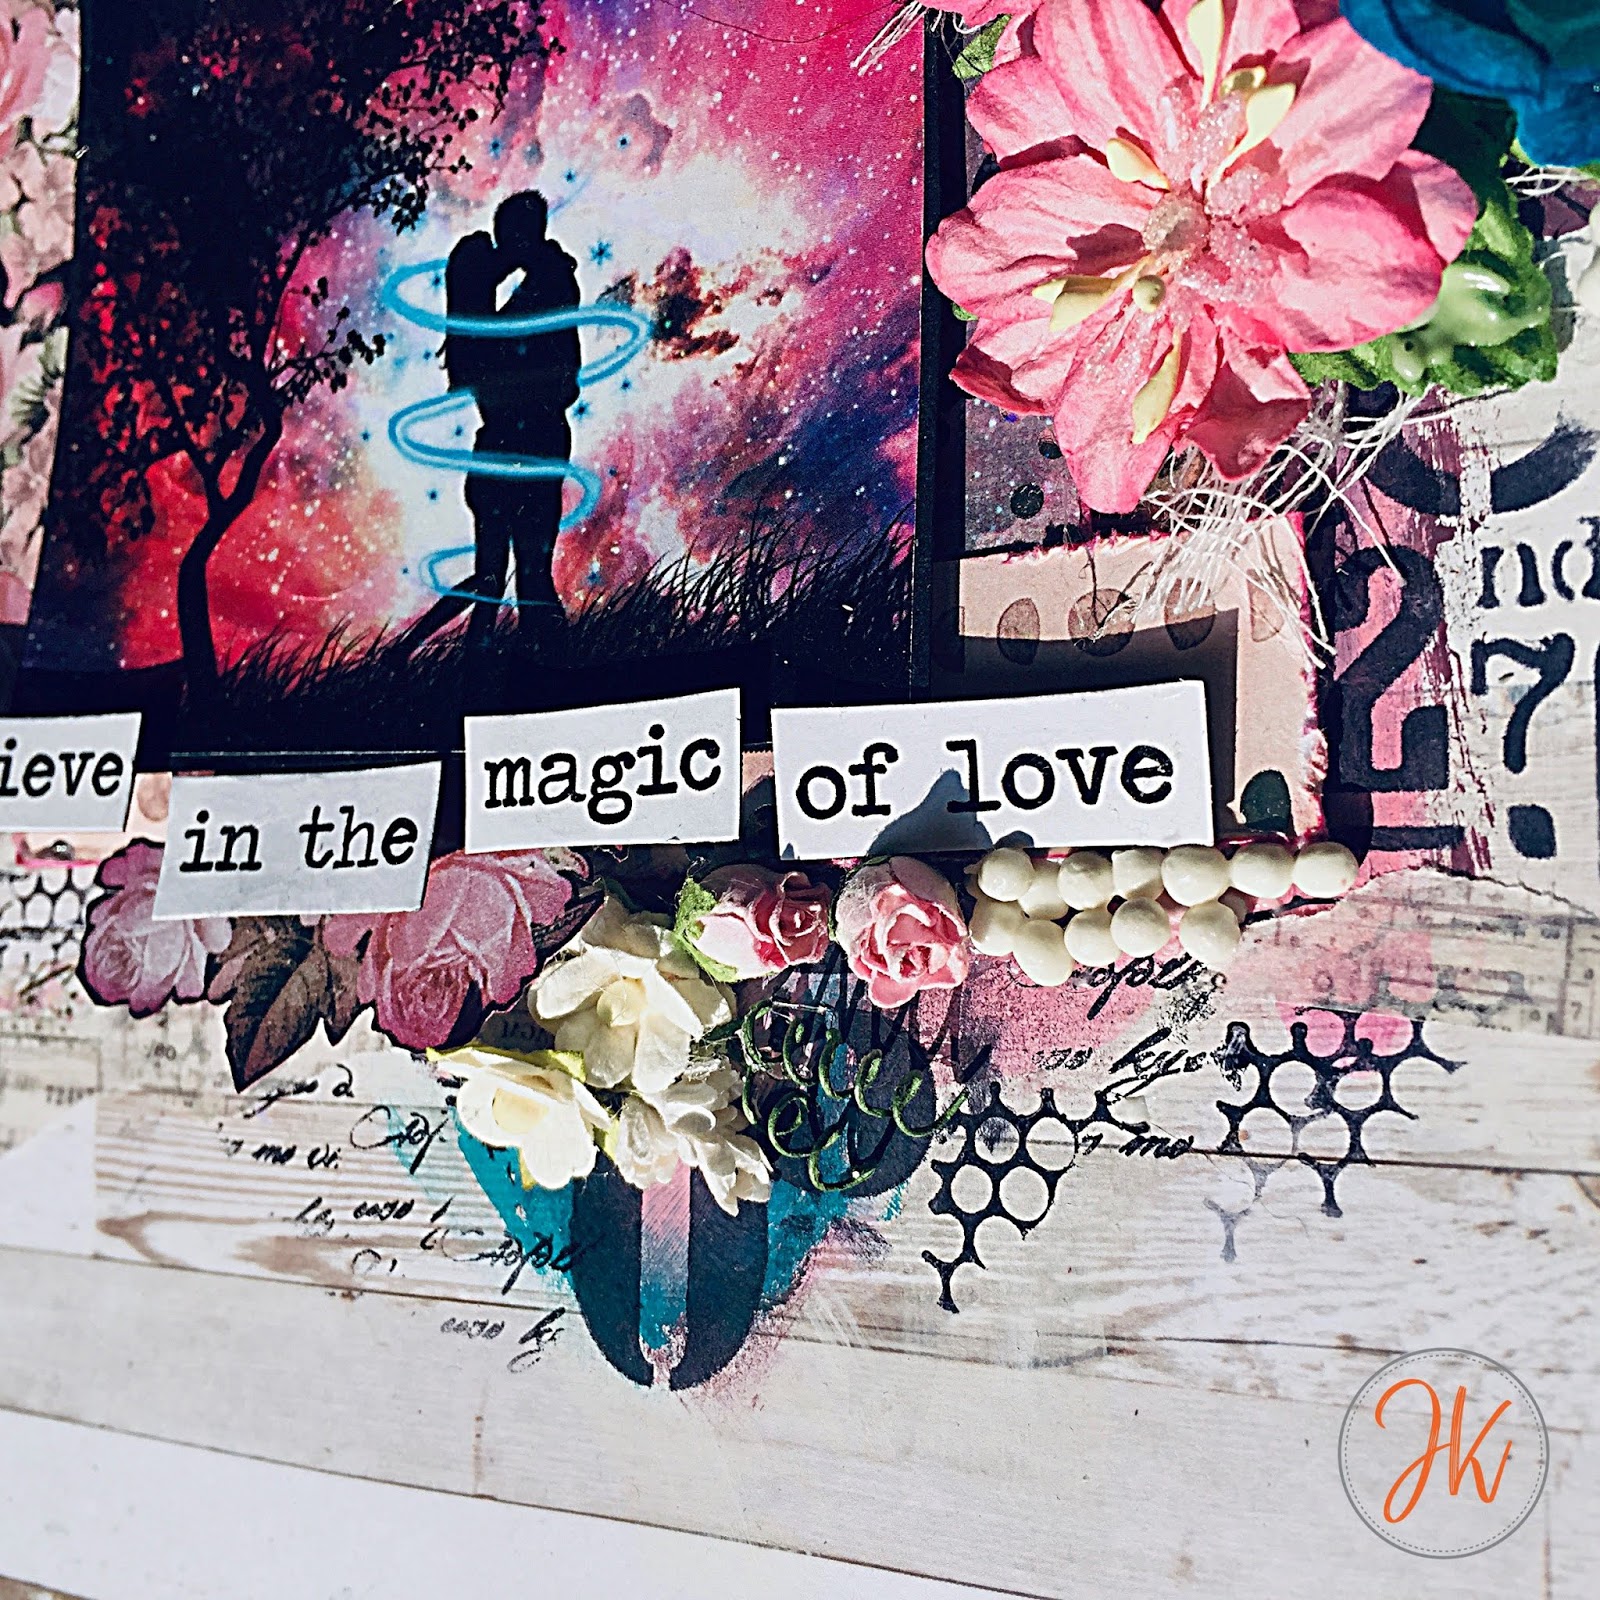
And now, here I present my layout 'Believe in the magic of love'.

I have been a true believer in the magic of love my entire life. I believe that if we love others then we can save the world. I believe that when we have such little time in our life we should love others and not spend that time hating one another. I believe love has the power to cure people and save them from their sufferings. I truly believe in the magic of love.
Here is a picture tutorial for you all on the same.
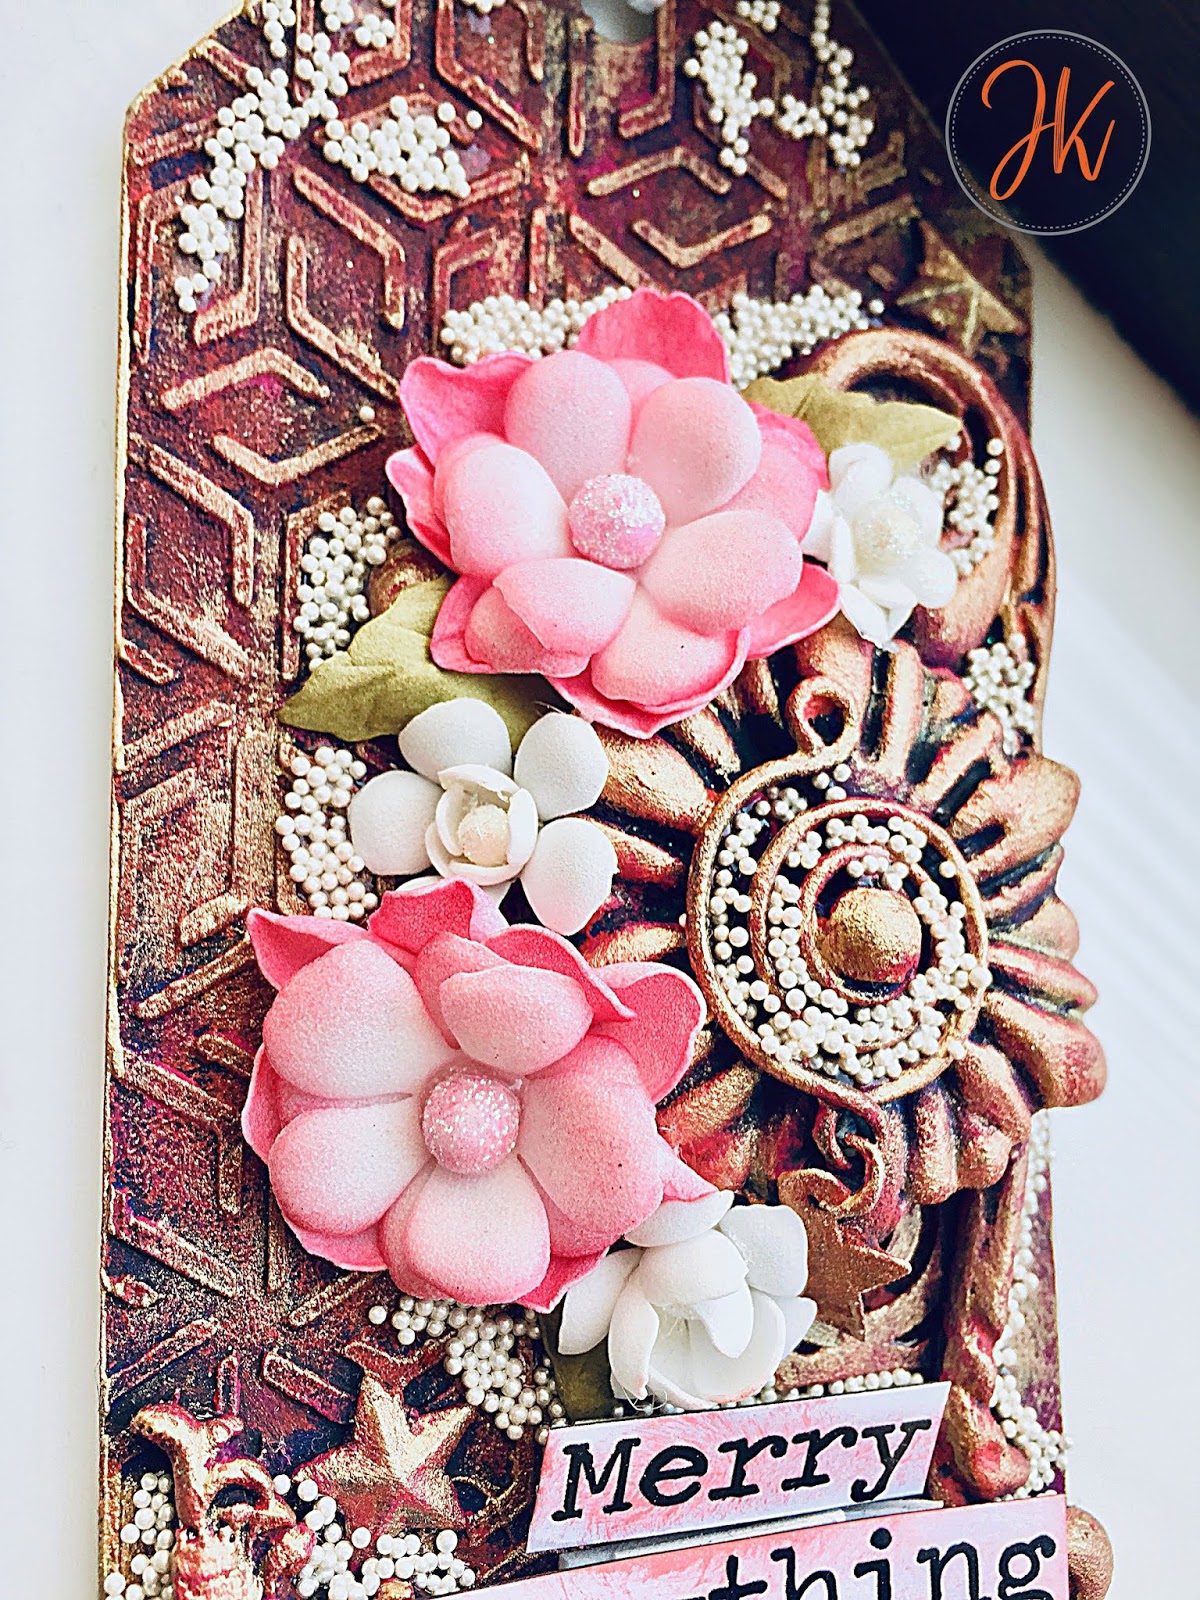
I started with adding some different shades of chalk paints around the image of my choice. I used my fingers to blend the colors with one another.


Next I added some washi tape here and there. I used a stitched stamp to add a border around my layout. I used some stencils as my stamps and using archival ink in black color created the numeric design around the frame and on the bottom left corner.

I also used a flourish and script stamp here and there to add some more layers around my frame.

Post my stamping in the background I added some pattern paper layers behind my image. I distressed the edges of the pattern paper and added some ink in the color raspberry.

Next I adhered my picture and added my fussy cut flowers as well as some mulberry flowers around the picture.

I finally finished off the layout by adding some deco stones here and there and some more stamping in the background around the image using a honeycomb and script stamp.


Let's take a look at some detailed pictures of the layout!


I hope you liked this project and are inspired to create one of your own. Don't forget to tag me in your creations inspired by this one, I would love to see them.
Until Next Time,
XOXO
JK
--
PS - This is my entry for More Than Words Blog's monthly challenge on the word 'Believe'.

I am super excited to share this last blogpost for the year 2018! This year has been super amazing for me as a crafter. My journey has been very bumpy and I saw many ups and downs. But with all of you all's support and overwhelming response to my creative projects, I feel blessed to be a crafter today.
Before getting into the project I want to thank each and everyone of you for liking my projects and always encouraging me to be able to make something new and exciting for you all to be inspired from.
And now, here I present my layout 'Believe in the magic of love'.

I have been a true believer in the magic of love my entire life. I believe that if we love others then we can save the world. I believe that when we have such little time in our life we should love others and not spend that time hating one another. I believe love has the power to cure people and save them from their sufferings. I truly believe in the magic of love.
Here is a picture tutorial for you all on the same.
I started with adding some different shades of chalk paints around the image of my choice. I used my fingers to blend the colors with one another.


Next I added some washi tape here and there. I used a stitched stamp to add a border around my layout. I used some stencils as my stamps and using archival ink in black color created the numeric design around the frame and on the bottom left corner.

I also used a flourish and script stamp here and there to add some more layers around my frame.

Post my stamping in the background I added some pattern paper layers behind my image. I distressed the edges of the pattern paper and added some ink in the color raspberry.

Next I adhered my picture and added my fussy cut flowers as well as some mulberry flowers around the picture.

I finally finished off the layout by adding some deco stones here and there and some more stamping in the background around the image using a honeycomb and script stamp.


Let's take a look at some detailed pictures of the layout!


I hope you liked this project and are inspired to create one of your own. Don't forget to tag me in your creations inspired by this one, I would love to see them.
Until Next Time,
XOXO
JK
--
PS - This is my entry for More Than Words Blog's monthly challenge on the word 'Believe'.