Showing posts with label expressions stencils. Show all posts

Wednesday, January 30, 2019

Travel More - Art Journal Page

Hola crafty peeps,

Many of you have asked me on how to make art journal pages, what to use, how to use! So to end all your misery I thought of doing a step by step tutorial for you all to watch and learn. I started art journaling only recently myself so i am gonna share all that I know with you all. 


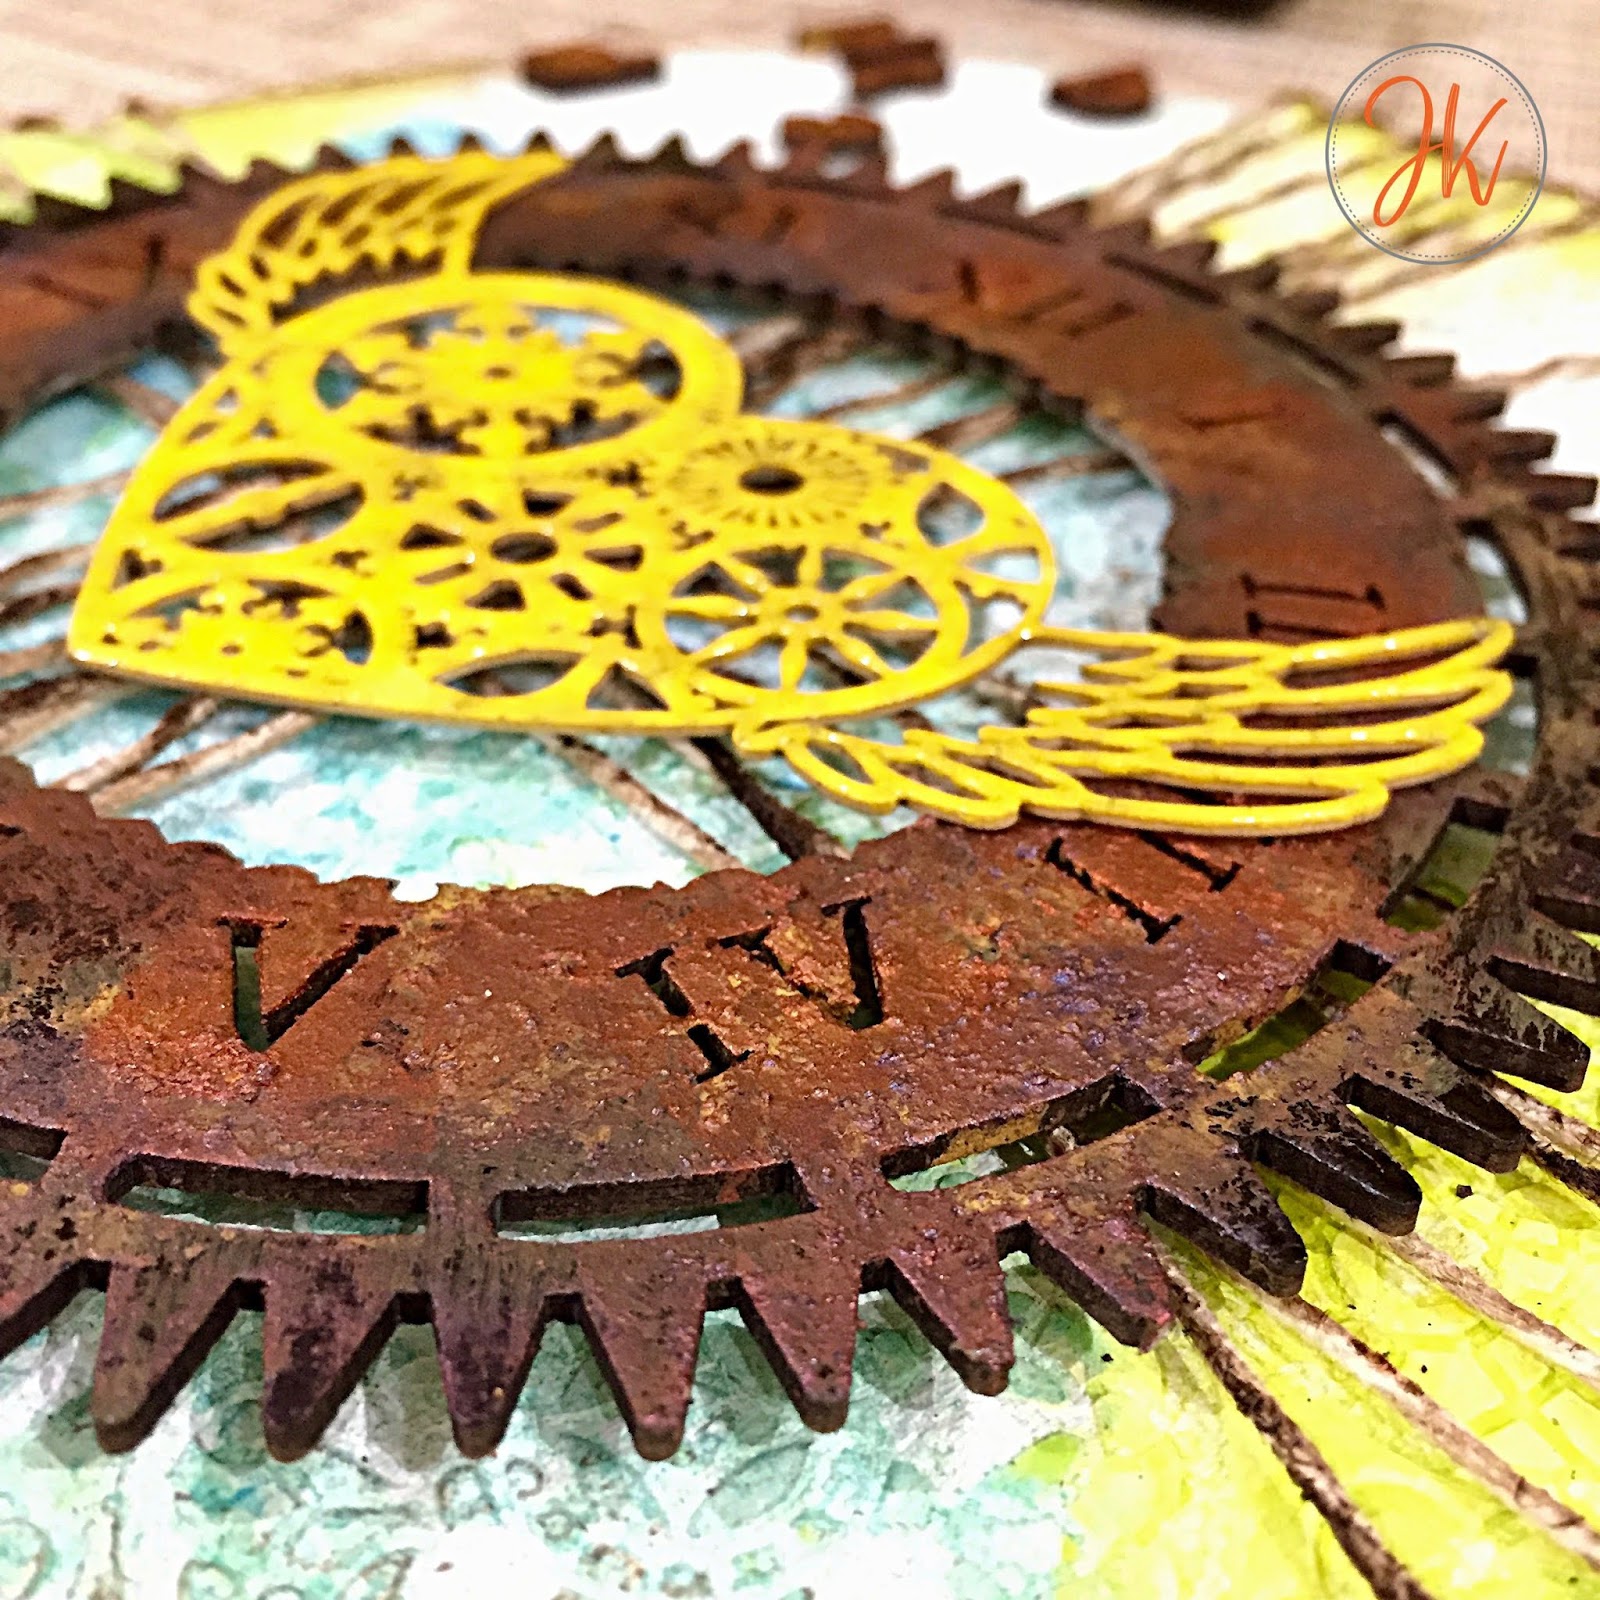
Since my goal for this year is to travel more and wander into nature as much as I can, therefore, I thought of representing it in the best way I know which is mixed media. here are some close ups - 


So let's dive into the tutorial!


Hope you liked the simple process of making this journal page and are inspired to create one of yours as well. Do tag me in your journal pages I would love to see them. 
Also, don't forget to follow my blog and subscribe to my YouTube channel for more video tutorials. 

Until Next Time,
XOXO

JK

PS - With this I participate in more than words monthly challenge. 

--

Supply List - 

Mod Podge Matte
Heavy gesso White - Expressions Craft
Heavy Gesso Black - Expressions Craft
Blue Atlas Chalk Paint - Expressions Craft
Pink Punch Chalk Paint - Expressions Craft
Stamps from Aliexpress
Jet Black Archival Ink
Diamond Stencil - Expressions Craft
Sentiment Stencil - Expressions Craft
Fuchsia Pink Sprinkle Mist - Expressions Craft
Washi Tape from Aliexpress

Saturday, December 15, 2018

Mixed Media Layout | Celebrating Life

Heya crafty people,

Are you all set for another inspirational project? Today I have for you a clean and simple mixed media layout. When we think of mixed media layout we generally end up making the layout full of textures and paints and embellishments. Today, I took the liberty of breaking that chain and creating something very simple. 

This project is created for this month's challenge inspiration post for Expressions Craft Studio as a DT member by me. This month's theme is Celebration and for me it meant celebrating my life!

My life has been my biggest teacher this year. I have seen the lowest low of my life and then fought back to be where I am today. So today, I take this opportunity via this inspiration post to celebrate my life and urge you to do so as well. Take out time for your own-self and celebrate it, celebrate yourself and your life! 


I used some chalk paints matching the image I chose and added them with my finger in a triangular shape. 
I then covered areas with washi tape. Next I used stencils and made numbers using archival ink and finger dauber. Finally i did some stamping here and there and added the beautiful roses along with sentiment stickers. 

Here are detailed images!


Hope you liked this inspirational project and will create your own. Also, don't forget to participate in the ongoing challenge at Expressions Craft here

Until next time,
XOXO

JK


Tuesday, November 27, 2018

Altered Mixed Media Frame

Hola crafty peeps, 

I am here with an altered frame with a twist. The twist is that I have used MDF window shutters to create a picture space on the frame itself. 


I have used the newly launched metallics form Expressions Craft Studio. The quality of these paints is just amazing. I loved the fluffy consistency of these colors and the sheen they have is brilliant. They work well on both black and white gesso without loosing the color and sheen. A total of 26 shades have been launched which you can buy from the website here.
I can go on and on about these beautiful colors but for now let's dig in to the project tutorial. 

Step 1 - I covered my window and the frame with IMMIX heavy white gesso.


Step 2 - Using IMMIX texture paste and the newly launched brick stencil add the design around the frame. 


Step 3 - Add some IMMIX crackle texture paste here and there and sprinkle some sprinkle glitz over it for some grungy texture. 


Step 4 - Adhere all the required chipboards and cover them with white gesso. Also adhere the window shutters in its place. 


Step 5 - I used the new launched chalk paint color red cherry wood and covered the brick area as far as possible. 


Step 6 - I highlighted the bricks pattern using the new chalk paint color Military brown


Step 7 - Using the newly launched metallics in the color jungle green I covered all the chipboard branches


Step 8 - Finally add all the flowers around the shutters along with deco art atones. I also in the end used metallic colors mari gold and bronze moon to highlight the window and brick wall texture. 


Here are some detailed pics - 


I hope you liked this mixed media project using the newly launched products from expressions craft. Do tag me in your projects inspired from this one. 


Until next time
XOXO
JK


Thursday, November 15, 2018

Seize The Day - Mixed Media Canvas for Beginners


Hello beautiful crafters,

Today on my table is a very easy to make canvas using the left overs from the stash. The techniques used in this project are very easy to follow and you will be able to make this beautiful piece of art in no time. So dig into your stash and get set go!


Before starting always prime your canvas with gesso – white or clear your choice. Next choose the stencil of your choice and create the design randomly here and there. I have used a doily stencil to create a design in the plus sign way. On the remaining area I added crackle texture paste to give it the grungy look I wanted.


Next is to figure out your focal point and the elements that go with it. I chose this steampunk winged heart chipboard from mudra. I heat embossed it using Yellow versa mark ink and some clear gloss embossing powder. I wanted to give this embellishment a 3-d effect so heat set it 3 times. I also heat embossed my clock dial in black first and then added the rust colors to make it look grungy.

Similarly, to fill in the blank spaces around the focal point I used some random mdf letters I had in my stash. I painted them with rust effect pastes from prima. You could use any mental charms or steampunk gears or even 3-d alpha stickers, whatever you have in your stash, to fill the space. Just prime your embellishments and then color at your wish. 

I used impasto paints to color my background and added some leftover jute cord to create more dimension. To distress the edges I used ink blending tool and distress ink pad in the color ground espresso.
Here are some detailed pics!


Let me know in the comments how did you like this beginners mixed media canvas. Don't forget to tag me in your creations inspired by this one.

Until next time
XOXO

JK


--

Supply list

  • IMMIX white gesso
  • IMMIX texture paste
  • IMMIX crackle texture paste
  • Expressions Craft doily stencil
  • Expressions craft Gear chipboard 
  • Mudra Steampunk heart chipboard
  • Prima Impasto paints - Azure & lemon peel
  • Prima rust effect paste set
  • Wow clear gloss embossing powder
  • Ranger black embossing powder
  • Prima metallique waxes - red amber & mystique turquoise