Showing posts with label black heavy gesso. Show all posts

Thursday, January 3, 2019

Mixed Media Shadow Box - Beauty in Simplicity

Hola beautiful crafters,

Wish you all a happy, crafty and a prosperous new year!  
Let's kick start this year with an exciting mixed media project. I have created a simple wall decor piece for you all. 


I have used a shadowbox made from black card-stock and embellished it with chipboards and metal embellishments to create this look. Since I have done a few mixed media projects for beginners, I thought of taking it a notch up for you all to experiment and see what more can be done with the same supplies. 

Here's the video tutorial!


Hope you all enjoyed watching it. Don't forget to subscribe to my YouTube channel and press the bell icon for regular video tutorial updates. 

Until Next Time,
XOXO

JK

--

Supply List

Chalk Paints- 

Monday, November 5, 2018

Mixed Media Treasure Chest

Hola crafty peeps,

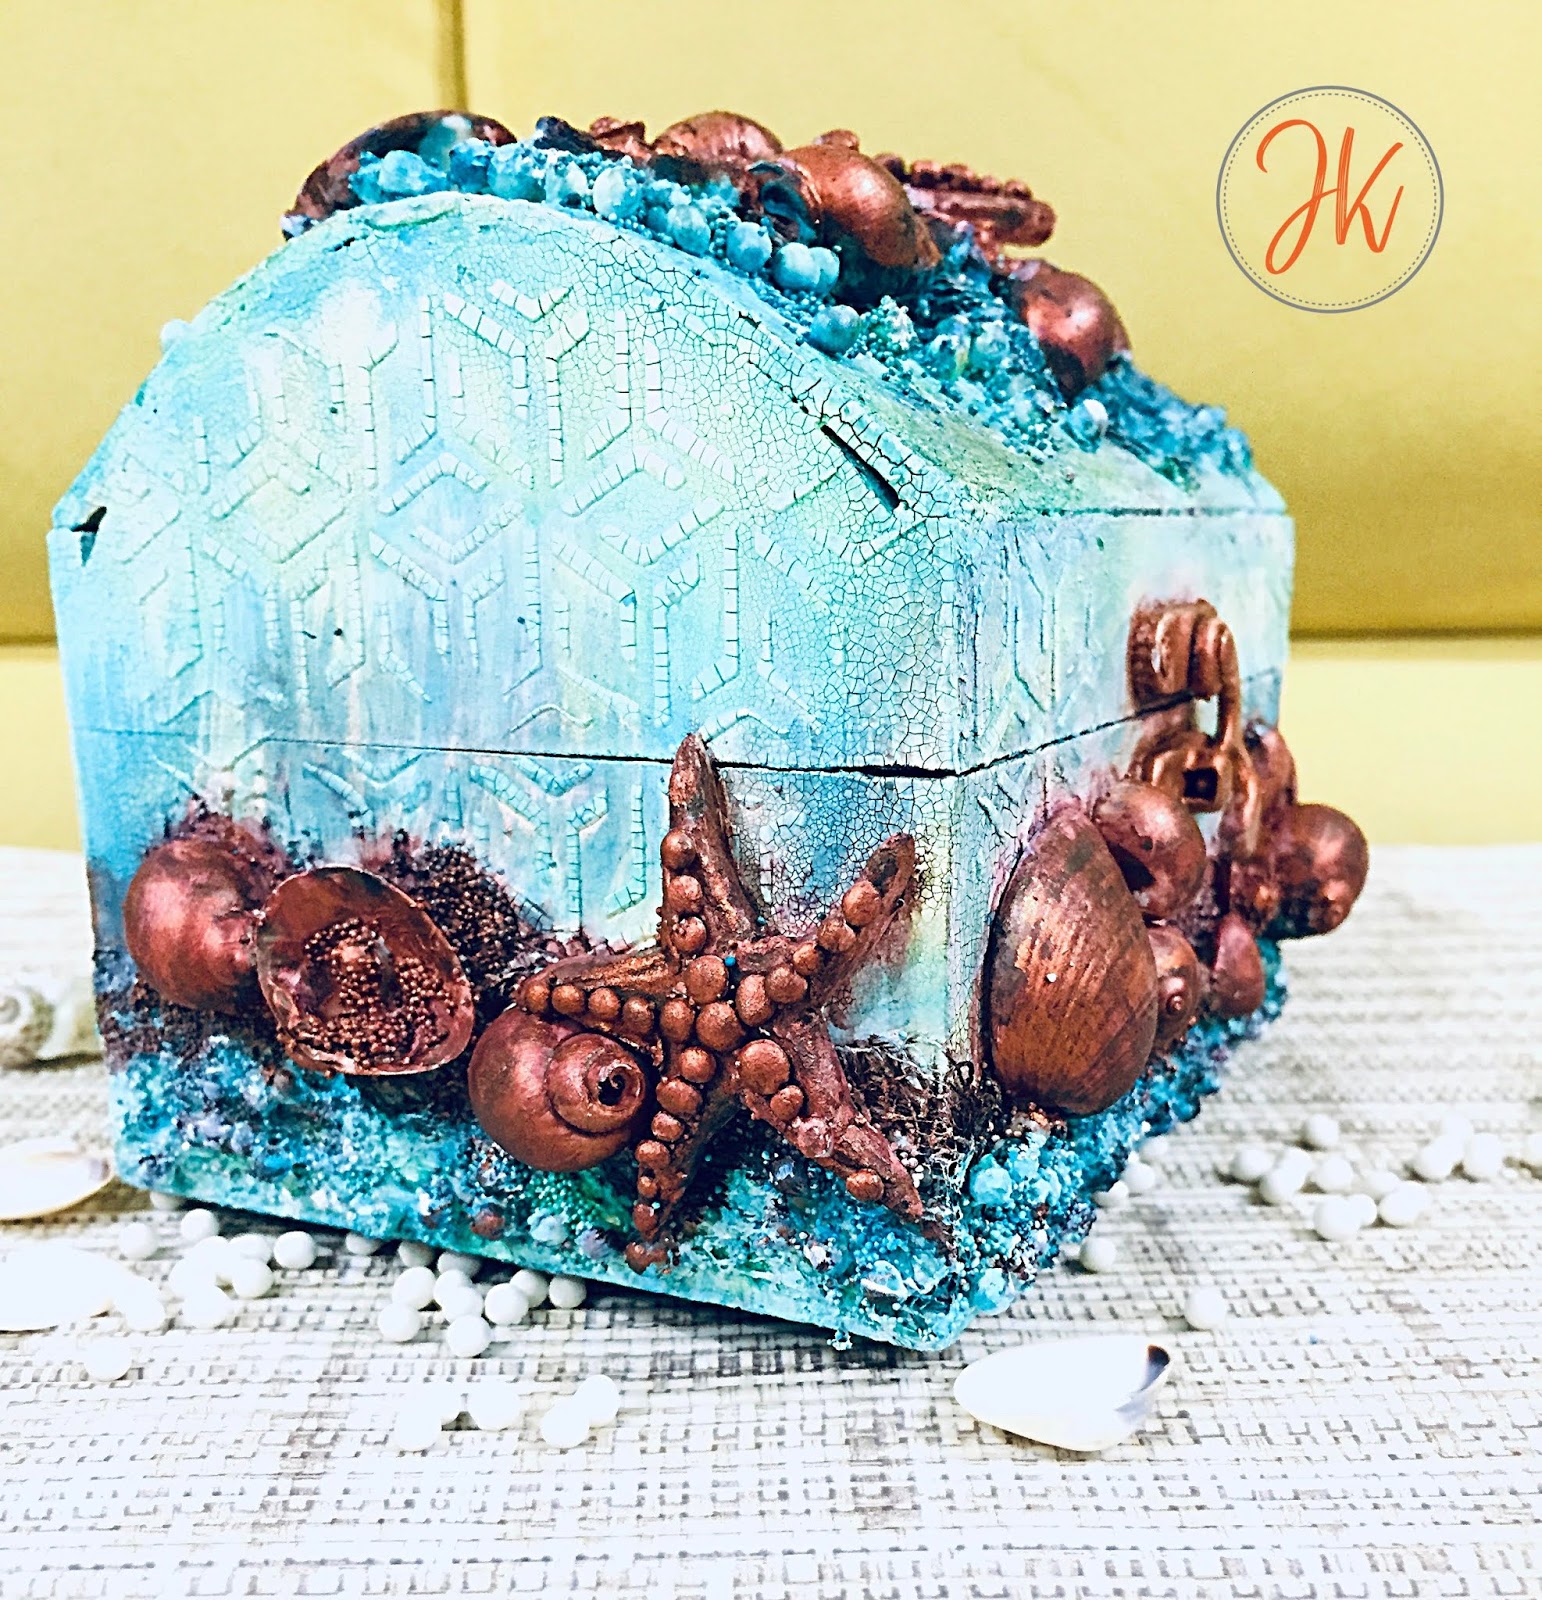
I am back with yet another mixed media project for you all. This time I have altered a MDF box into a beach theme treasure chest. This project was made for Expressions Craft's monthly challenge  inspiration as one of their design team members. 

I have used very simple techniques in creating this. I used lots of seashells and a few handmade paper clay starfishes. Going with the mood-board, I have used teal and rust colors for my project. So without further wait, let's dig in!

Step 1 - Cover the box with white gesso first and then add black gesso on all the edges.


Step 2 - Cover all the black gesso areas with crackle texture paste and let it dry naturally. Apply a mix of thick and thin layer of crackle texture paste. 


Step 3 - Once dried completely, Using the stencil of your choice and crackle texture paste, make designs on all four sides of the box. 


Step 4 - Once all the crackle paste is dried, adhere all beach elements & deco art stones using heavy body gel medium and let dry. After the elements have stuck properly, cover everything with white heavy gesso. (I added a layer of medical gauge on top of the box before adding my elements.)


Step 5 - Color the box base in teal color and all the elements in rust color. I added a lil bit of yellow as well to make the transition of the colors look real. 


Let's get a closer look!


Hope you like the project! Do tag me in your creations if you are inspired by this one. And lastly, do not forget to participate in the ongoing challenge at Expressions Craft studio here. 

Until next time
XOXO

JK


--

Supply list - 
  1. IMMIX Heavy Gesso - White & Black
  2. IMMIX Deco Art stones - Medium & Mini
  3. IMMIX Crackled Texture Paste
  4. IMMIX Sprinkle Mists - Deep Teal, Persimmon, Chest Nit, Burnt Orange
  5. Expressions Craft Stencil - Weave Pattern

Wednesday, October 24, 2018

Altered Bottle

Hola crafty peeps,

With halloween around the corner and fall season upon us, I thought of creating something different. As mixed media is my first love, I have tried to alter a glass bottle in a very rustic pirate kind of style. I have used the beautiful Immix products in my alteration. lets dig in!


For the background, I started by adhering foam sheet cut into small rectangles and squares. I added some flat back pearls to give the effect of nails on the corners of each piece. I used the inner spears of the gear chipboard from expressions craft to adhere on the front of my bottle. Next I used some old ball chain in the smallest size and wrapped around the bottle in a very unmanaged way.


I covered everything on the bottle with IMMIX black heavy gesso. I sprayed some IMMIX sprinkle mist in the color Deep Teal and while it was wet, sprinkled IMMIX fairy dust blue. It gave my bottle a very sparkly blue look. Once dried, I dry brushed IMMIX baby blue chalk paint on the bottle unevenly. this gave the bottle a very nice faded jeans effect. 


Now came the part where I had to give the rust effect. To create my own rust colors, I used acrylic paints and added some sprinkle glitz to it. This can be achieved by adding sprinkle glitz to IMMIX chalk paints as well. Only a pinch of sprinkle glitz is more than enough. I used the colors sienna, red and mustard in acrylic paints. All you have to do is dab the three colors here and there on top of each other. 


Try not to cover the entire bottle, leave some places for the background color to be visible. Once all dried, I topped the nails and my front embellishments with some mettalique wax and sprayed the IMMIX sprinkle mist in the color citrus yellow to highlight my embellishments and some other random areas. 


The IMMIX products are truly amazing and you should really try them in your projects to get a wonderful finish. 
Thanks to these products I was able to achieve this amazing rustic look. 


I hope you liked my alteration and are inspired to make one for yourself too. Do tag me in your creations if you make any on the similar lines. Leave a comment below in case you have any questions. 

Until next time
XOXO

JK

---


Products used


IMMIX black gesso

IMMIX chalk paint baby blue
IMMIX magic sparks
IMMIX fairy dust blue
IMMIX sprinkle mist citrus yellow
IMMIX sprinkle mist deep teal
Expressions craft chipboard embellishment gear
Prima marketing rust effect paste set