Hola crafty peeps,
Up for another inspiring project to make your weekend more crafty? I have recently started my own art journaling. As a mixed media artist i feel that many ideas that we have go unimplemented and later forgotten. So to capture most of my ideas on regular basis, I started art journaling.
In my opinion Art Journal is an artist's space where he/she can be themselves. Make what their heart desires without fear of making a mistake. Trying hands on a new technique I bring to you a page from my art journal. Ta-da!

To create this art journal page I used the minimum supplies possible so that any beginner can make one too. So without further a due let's see how its done!
Step 1 - Prime the areas of the pages, where you have to work, with white/clear gesso.
Step 2 - Take any string/cord long enough to make spirals and dip it into the spray paints of your choice. Take out the string and make circular spirals on the page. Put a waste paper on top and press a little hard and pull the string from below the waste paper. And voila! you have a beautiful string texture + color on your page.
Repeat the process with as many colors you want, I used three.

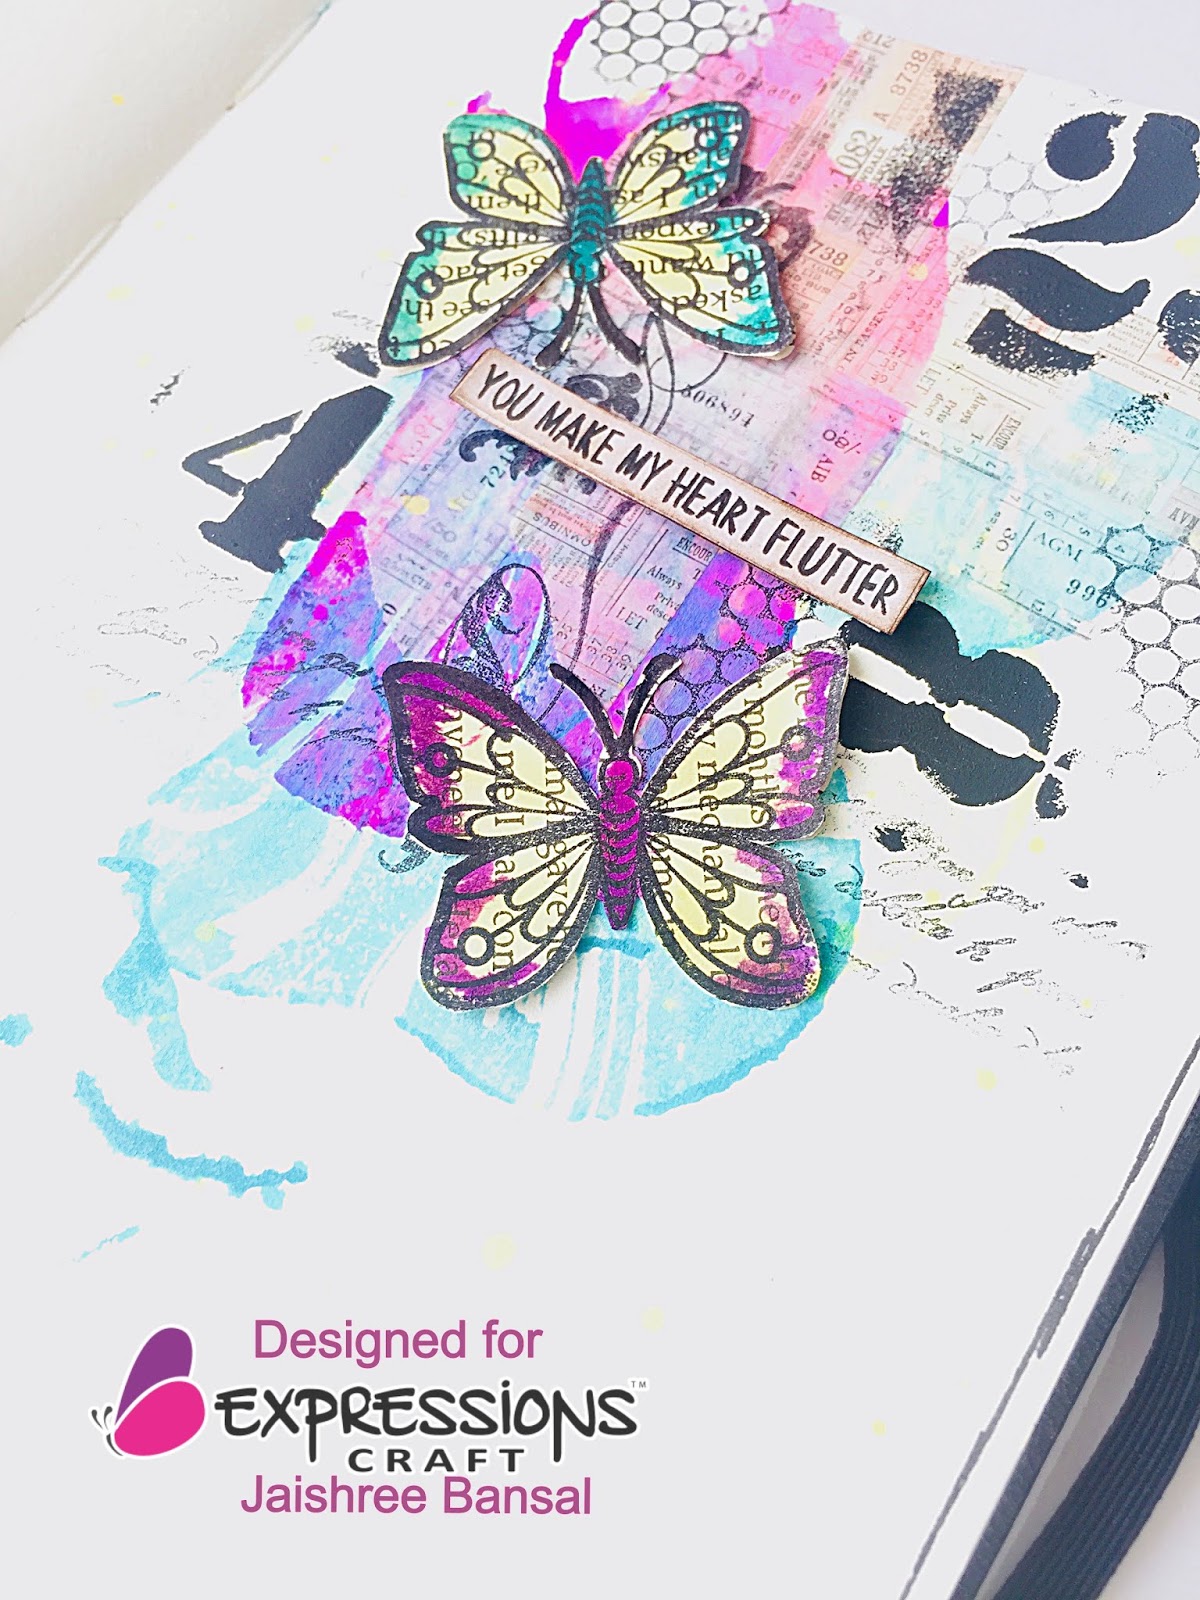
Step 3 - Use some washi tape and apply it here and there to add another flat layer and give your page a little texture.

Step 4 - Take any stencil of your choice and add color with the help of a sponge and black gesso. I used the newly launched mini stencils from Expressions Craft. I think they are perfect to work with on projects with smaller areas. I used the number stencil here.

Step 5 - Stamp and cut a couple of butterflies on an old book paper and color it using the spray paints used earlier.

Step 6 - Add the butterflies on one side of the page along with a sentiment and on the other side of the page just add the sentiment.
Step 7 - Lastly, using a background stamp, stamp here and there to add more texture and using a gel pen black, make a boundary with free hand.

Here are some close up images!


Hope you liked this project and are inspired to make one of yours too. Do tag me in your projects inspired by this, I love to see your creations.
Until Next Time,
XOXO
JK


