Hello crafty friends,
Wish you all a very Happy New Year! Let's all have a very creative 2018.
And to kick start this year I have a very beautiful mixed media canvas to share with you all. This is my first try with Prima Marketing paints & waxes. So without further adieu lets get started.
To start with the project I used an old MDF board, which had been lying around with me from quite a while, as my base. When doing a mixed media project I first like to collect all the embellishments and other materials required.
Second step would be to prime all the embellishments with white heavy gesso. I only painted the back of my MDF board with gesso and not the front as I wanted my canvas to have shabby look with the burlap background.
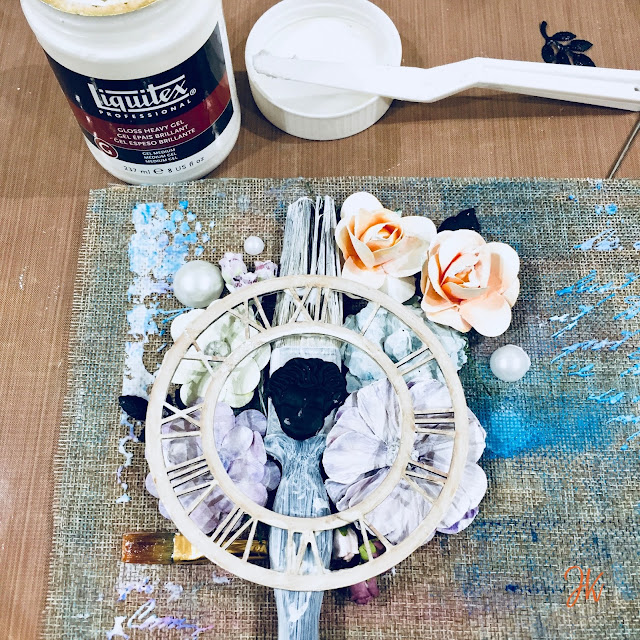
The third step is to attach the burlap (you can use a pattern paper of your choice as well) to the base with the help of a heavy body gel medium. In case of a paper you can use tacky glue as well.
Once the burlap is adhered to the base and dried, I used a script stencil and covered a few places using a texture paste.
Once the texture paste dried out, I used impasto paints to give the shabby colored look to the canvas. Make sure you dilute the paints while painting or keep spraying water or else paint will stick to one place and become difficult to work with.
Next step is to adhere the embellishments in the order you desire. I used heavy body gel to adhere them and leave it overnight to dry out. In case of a hurry you can use hot glue as well to stick them.
Since it was difficult to work on the embellishments under the clock dial for me I removed it and stick it back after the painting of the embellishments.
I started painting the embellishments with impasto paints in the color cobalt as my base color on all of the embellishments giving them full coverage. Do keep in mind you have to dry brush the paint on the embellishments and not add even a single drop of water unlike base painting. 2 coat was of the color crimson and the final coat was of Azure to highlight a few places of the embellishments.
You can color as per your wish and keep on adding the paint colors until u get you desired result.
After the paints have dried out, i used two metallic wax colors - bronze age and rose gold. Please keep in mind these waxes a re highly pigments so a pinch of wax is more than enough to cover all your embellishments.
I used a pocket card as my sentiment. I colored it with my impasto paints as well. And finally added some art stones to bring the whole look together.
I didn't like the white of the art stones, and decided to color and wax them the same way i did all my embellishments.
Here's the complete look of the canvas in detail and in close-up.
Hope you liked it and are inspired to make one of yours too. For any more information or queries, leave a comment below and i will be happy to help.
Until next time,
XOXO,
JK


No comments:
Post a Comment